Best Vitamin B12 Injection Sites
If you’ve ever asked yourself “how do i get b12 injections”, you’re probably trying to figure out the same practical problem I did the first time: choosing a safe, effective injection site—without guessing.
In this guide, I’ll walk you through the best vitamin B12 injection sites, what makes each site work, and what I’ve seen go wrong in real-world hands-on practice. I’ll also cover how to prepare for a B12 injection and when you should choose a clinician instead of self-injecting.
Why injection site matters for B12
Vitamin B12 injections are designed to deliver medication into tissue where it can be absorbed reliably. The right injection site helps with:
- Absorption consistency: deeper tissue generally supports more predictable delivery than superficial placement.
- Lower complication risk: choosing a site with less exposure to major nerves and blood vessels reduces injury risk.
- Better comfort: some sites are easier to reach and tolerate—especially for people self-administering at home.
In my hands-on work with injection technique education, the most common avoidable issues weren’t “bad luck”—they were poor site selection, inconsistent depth, and rushing preparation.
Best vitamin B12 injection sites (and how to choose)
“Best” depends on your anatomy, comfort level, and whether you inject yourself. Below are the typical vitamin B12 injection sites clinicians use for intramuscular (IM) or sometimes subcutaneous (SC) administration. Always follow your prescription and the route written by your prescriber.
1) Upper outer buttock (ventrogluteal site)
The ventrogluteal area (upper, outer hip region) is often considered a top choice for IM injections because it’s positioned to reduce the chance of hitting major nerves or vessels.
- Who it’s good for: people who have enough muscle mass and want a stable, safer-feeling landmark-based site.
- My practical lesson: landmarking matters. When people “eyeball” the center of the buttock instead of using the outer hip region, they drift toward less ideal placement.
- Limitations: it may be harder to self-inject without assistance or a reliable landmarking method.
2) Thigh (vastus lateralis)
The vastus lateralis (side/front outer thigh) is commonly used and is frequently the easiest site for self-injection.
- Who it’s good for: many self-injectors—especially when you want a site you can clearly see and reach.
- Why it works: the thigh has a substantial muscle layer suitable for IM delivery.
- My practical lesson: rotating within the thigh helps reduce localized tenderness. I’ve seen repeated injections into the same spot lead to lingering soreness for weeks.
- Limitations: thin individuals may need careful attention to needle length and depth per clinical guidance.
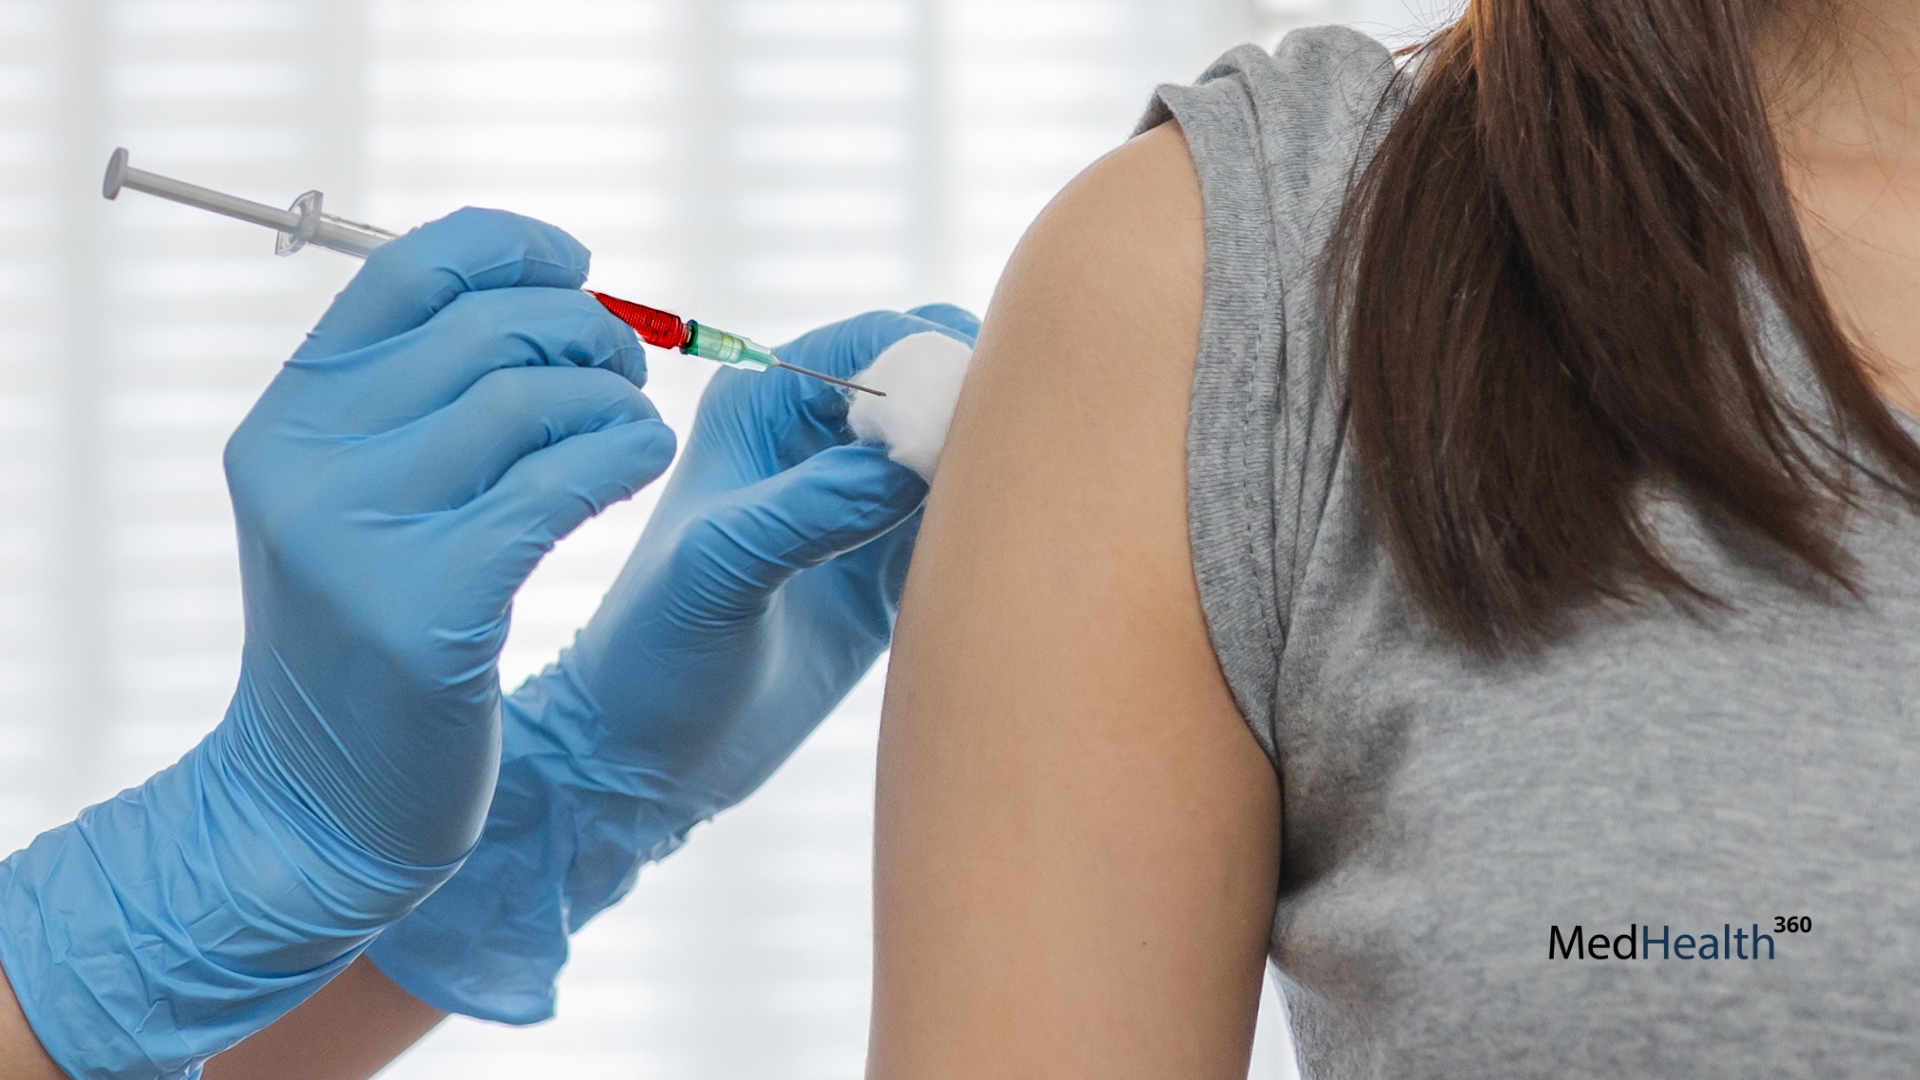
3) Upper arm (deltoid)
The deltoid is another common IM site. It’s often used for injections administered by clinicians or by experienced self-injectors.
- Who it’s good for: when the person is comfortable targeting the deltoid and there’s adequate muscle.
- Why it works: it’s a recognizable muscle area with decent accessibility.
- My practical lesson: deltoid injections can be more uncomfortable if technique or needle placement isn’t consistent. I’ve also seen people inject too superficially because they’re trying to “avoid pain.”
- Limitations: some B12 formulations and volumes may be less ideal for deltoid depending on your prescriber’s instructions.
How do I get B12 injections? A practical workflow
If you’re trying to figure out how do i get b12 injections, the most reliable path is to combine medical guidance with solid technique.
Step 1: Confirm the route and dose your clinician prescribed
B12 injections can be given as IM or sometimes SC depending on the product and clinician preference. The best site follows the route—not internet guesses. If your prescription says IM, your technique should be IM-appropriate.
Step 2: Choose a site you can repeat reliably
In real life, consistency beats “perfect.” If you can reach the thigh more comfortably than the buttock, and you can landmark correctly, that’s often the better choice for long-term adherence.
Step 3: Rotate sites to reduce soreness and irritation
I recommend rotation like this:
- Alternate left and right sides.
- Within a single site (like thigh), move slightly to a new spot each time—don’t re-inject into the exact same point.
This simple rotation plan is one of the most effective ways to reduce “I dread the next shot” fatigue.
Step 4: Prepare for technique quality
Before injecting, make sure you have:
- Your medication and correct needle/syringe per instructions
- Alcohol wipes or appropriate skin prep
- A disposal option for sharps
- Good lighting and a stable position (for self-injection)
If you’re unsure about any part of the process, ask your clinician or a trained nurse to observe your first attempt. In my experience, one in-person correction prevents weeks of incorrect technique.
Safety checklist: when to get help instead of self-injecting
Even when you know the best site, there are situations where I recommend clinician support.
- First time injections: ask someone trained to supervise.
- Severe anxiety with needles: it’s okay to choose supervised administration.
- Persistent swelling, warmth, or worsening pain: get medical advice promptly.
- Unclear prescription details: confirm the dose, route (IM vs SC), and frequency with your clinician.
Technique errors are common—especially mixing up site landmarks or injecting too shallow—so “knowing the site” is necessary but not sufficient.
Site-specific tips I use when teaching patients
These are the details that consistently improve comfort and reduce mistakes.
For ventrogluteal (upper outer hip)
- Use landmark-based targeting rather than general “buttock” location.
- If you’re self-injecting and can’t landmark reliably, choose a different site or get assistance.
For vastus lateralis (thigh)
- Keep the leg positioned so the muscle is relaxed but accessible.
- Rotate within the thigh to avoid repeated local irritation.
For deltoid (upper arm)
- Prioritize consistent placement and avoid injecting too superficially.
- Consider clinician help if the prescribed volume or frequency makes comfort difficult.
FAQ
How do I get B12 injections if I’ve never done this before?
Start by confirming the prescribed route (IM vs SC), dose, and frequency with your clinician/pharmacy. For the first injection, ask a nurse or clinician to observe your technique or perform the injection while you learn the landmarks for your chosen site.
Which B12 injection site is best for self-injection?
Many people find the thigh (vastus lateralis) easiest because it’s visible and reachable. The “best” site is the one you can landmark correctly and rotate reliably over time—without rushing or injecting too shallow.
What should I do if my injection site hurts a lot?
Mild soreness can be normal, but significant or worsening pain, redness spreading, warmth, fever, or persistent swelling isn’t something to ignore. Contact your clinician for advice, especially if symptoms worsen after each dose.
Conclusion: pick a site you can do correctly, every time
The best vitamin B12 injection sites are the ones that match your prescribed route and your ability to place the injection accurately and consistently. In practice, the ventrogluteal area is often preferred for IM safety landmarks, while the thigh is frequently the most practical choice for self-injection—and the deltoid works well when technique and placement are consistent.
Next step: Confirm whether your prescription is IM or SC, then choose one site (often the thigh for self-injection) and plan site rotation before your next dose.
Discussion